Made in Canada Free Artwork & Mockup Fast Turnaround No Setup Fees
Make a Patch
+1 (226) 455-0120 info@canadapatches.com

Patches Backing Guide

Step-by-step instructions for attaching your custom patches with iron-on heat presses, hook & loop fasteners, and permanent sewing.
Iron On Backing
1. Iron-On Application
Heat Seal Film

Best for 100% cotton, denim, canvas, and polyester blends. Do not iron onto leather, waterproof nylon, or silk.
  1. Preheat iron or commercial heat press to 320°F – 350°F (160°C – 175°C). Turn off steam completely.
  2. Position patch onto the desired garment location.
  3. Place a thin cotton cloth or Teflon sheet over the patch to protect thread colors from direct heat.
  4. Apply firm downwards pressure for 20 to 25 seconds without moving the iron back and forth.
  5. Flip garment inside out and apply heat for an additional 15 seconds directly to the back of the fabric.
  6. Allow the garment to cool completely for 24 hours before wearing or washing.
Velcro Backing
2. Velcro (Hook & Loop)
Tactical Quick Swap

Ideal for tactical vests, military gear, police plate carriers, and flight jackets where interchangeable badges are required.
  • Hook Side (Hard / Rough): Stitched directly onto the back of your patch during factory production.
  • Loop Side (Soft / Fuzzy): Provided with your order. Sew the loop fabric piece onto your jacket, vest, or backpack.
  • Once attached, the patch can be swapped, washed separately, or removed in seconds.
Sew on Backing
3. Sew-On (Plastic Backing)
Permanent Lifetime Hold

The gold standard for motorcycle leathers, heavy winter coats, and commercial work overalls.
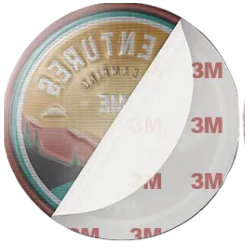
  • Features a thin plastic sealant backing that keeps embroidery stiff and flat over years of heavy wear.
  • Pin the patch securely onto your garment using fabric pins.
  • Using a heavy-duty sewing machine or hand needle with nylon/polyester thread, stitch around the inside channel of the merrowed border.
  • Permanent bond guarantees zero lifting through hundreds of industrial washing cycles.
Adhesive Backing
4. Peel & Stick (Self Adhesive)
Temporary Sticker

Best for single-day conventions, promotional trade shows, gift giveaways, and smooth plastic/metal surfaces.

  • Simply peel away the paper backing layer to reveal the pressure-sensitive adhesive.
  • Press firmly onto a clean, dry surface for 10 seconds.
  • Can be removed without leaving residue on most garments. Can also be sewn on later for permanent use!

ORDER YOUR CUSTOM PATCHES WITH THE RIGHT BACKING

Get professional advice from our patch masters and receive a free digital proof within 24 hours.

Configure & Request Free Quote