- Made in Canada
- Free Artwork & Mockup
- Fast Turnaround
- No Setup Fees
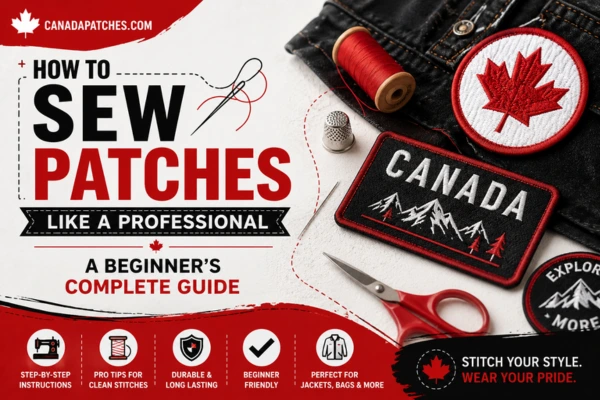
Learning how to sew patches is an invaluable craft that allows you to customize jackets, hoodies, jeans, backpacks, uniforms, caps, and any other items made of fabric. Patches can be not only used as a means of customization of your outfit but can also serve as a way to cover some worn spots, show your affiliation with something or somebody, display your accomplishments, or just make a fashionable statement. It can be rather difficult to learn how to sew patches if you have never done this before. However, with the proper needle, thread, sewing method, and positioning of the patch, it becomes a very easy procedure.
Sewing differs from using adhesives in the fact that it makes a physical connection between the fabric and patch. This makes it especially convenient if you are going to wear the garment frequently, wash it, go outside in it, etc. The most important thing is to understand which stitch is to be used, prepare the fabric properly, and fix the patch without damaging it.
Here you can find all information about how to sew patches both by hand and by machine.
Patches which require sewing onto clothes or any other fabrics are sew-on patches. These are fabric patches, which require the use of sewing threads and need not necessarily use heat activated adhesives, like iron on patches.
Sew-on patches generally have embroidery, woven, print, or fabric surface with the edges finished properly. The border of the patch plays a very important role in ensuring that there is something firm enough for the needle and thread to penetrate.
They are usually found on denim jackets, motorcycle jackets, uniforms, backpacks, work clothes, sports apparel, hats, and even on canvas bags. They are most suited for applications where durability counts.
The thickness and construction of the patch itself determine how easily the patch can be sewn on. While a light weight woven patch will be flexible and easy to sew, a heavy embroidery patch can be quite thick at its borders.
Sewing is always preferred when durability is of utmost importance. The iron-on patch is held by adhesives that eventually lose their effectiveness due to regular washing, high temperatures, friction, and even moisture. There is added physical strength in sewing that is independent of the strength of adhesives.
Sewing also becomes handy when the fabric is not safe from high temperatures needed for an iron-on patch. Some delicate fabrics, coated fabrics, waterproof fabrics, synthetic fabrics, or heat sensitive fabrics tend to get damaged at high temperatures.
A sewed patch may also be easily removed as compared to an adhesive patch that tends to bond strongly with the fabric, although stitches may leave holes in the fabric.
For clothes that need frequent washing or exposure to outside conditions, it is often recommended to sew the patch around its perimeter. Sometimes a patch can be fixed with temporary adhesives and later sewed permanently.
With the proper tools, the procedure will become much simpler and easier, resulting in better quality of the outcome. The basic equipment that you will need includes a patch, the clothing item on which you intend to sew a patch, appropriate needles, tough threads, scissors, and pins.
You will have to choose your needle depending on the type of fabric and the patch that you wish to use. The sharp sewing needle can be appropriate for thin and light patches while thicker embroidered patches may require tougher needles.
Your choice of thread is just as crucial. Polyester thread is usually used since it is tough enough and resistant to moisture and washing. You can also use cotton thread, especially if it matches your fabric, although polyester thread usually has higher resistance and durability in washing.
A pair of sharp scissors is necessary for trimming the excess thread after the stitches. Pins or fabric clips prevent your patch from moving while you are sewing it.
Thimble can also be useful when sewing by hand.
Good preparation can help solve a number of potential difficulties when sewing.
First, if the garment in question is new and was not washed recently, it needs to be washed and dried thoroughly. Fabrics can have manufacturing residues, dust, or oil which makes handling more complicated. The garment must dry out before patching.
The garment is placed on a table and its precise placement is determined. It is necessary to consider the way in which the garment will fold. Patches near a seam line, pockets, a zipper, or curving edges might be harder to sew and not lie flat.
Once the spot is determined, the patch is put on the table and its alignment is checked from various positions. In the case of jackets or shirts, the relative position to seams and pockets is taken into account. For bags, one should see how the patch looks while carrying it, not just lying down.
Patching should be pinned before starting. When there is adhesive backing, it is sometimes possible to attach it in a delicate manner according to instructions, but the stitching should be the main method of attachment.
Hand sewing is one of the easiest techniques for people who are just learning due to the simplicity in terms of materials needed. In addition, it gives total control over each stitch and its placement.
Thread the needle using a suitable length of sturdy thread which should be easy to work with. Do not use too much thread because it may get tangled up. Make sure that one end is knotted.
Place the patch where you want it and keep it in place firmly. Always make sure that you start working from below the fabric so as to hide the knot.
Take the needle through the fabric right next to the edge of the patch. Thread the needle so that the knot catches onto the other side of the fabric.
For some patches, whip stitching is quite a good choice. Pass the needle from beneath the fabric, then take it over the edge of the patch and then back into the fabric.
Ensure that the distance between stitches is close enough that the patch does not come loose. Do not sew so close to the edge of the patch that the thread comes through the fabric of the patch itself.
Move slowly all around the whole patch. It is a good idea to check the back from time to time to make sure you are not sewing any other layers of the garment.
At the end of your sewing, finish the stitch by tying a few knots on the inside of the garment. Cut off the excess thread.
The final result will be a patch firmly sewn onto the fabric.
What makes the best stitch is the kind of pattern, fabric, and look the stitch should produce. The easiest stitch is the whip stitch as it is easy to do for those who are just beginning to sew. It will secure the edges of the patch, yet will not make your work complicated. A blanket stitch can give a nice and decorative touch to the border if it is visible. Also, a straight stitch can be sewed carefully around the border. It will depend on the machine that you are using.
What makes the most durable work is not the type of the stitch itself but all its details together: spacing, quality of the thread, tension, etc. A professionally sewn patch will always have stitches evenly distributed along the border.
Sewing machines are useful to apply patches faster especially where several patches are being applied or when working with fabrics that are tough.
Before commencing work, pick a proper needle and thread. For instance, a heavy needle can be required for tough patches or denim fabrics. It is advisable to pick a thread color that matches the color of the edge of the patch or a thread color that complements the edge color.
Place the patch on and then pin or clip it to the fabric. If pins have been selected, place them in a manner that does not affect the movement of the presser foot.
Select a medium stitch length setting for your sewing machine. Sew all around the edge of the patch.
When dealing with curved patches, more caution should be exercised. The fabric cannot be forced to bend at the curve. You should stop at intervals with the needle down, lift the presser foot, turn it a bit and proceed with sewing.
Once you reach the initial point, allow for some overlap of stitches, then tie the thread according to the machine’s settings. Cut off any excess threads.
In case the patch is too thick, do not force the machine into sections where the needle has trouble piercing the fabric.
Both methods may provide good quality results; however, they are intended for various uses. Hand sewing allows more control and is good for single use. Whereas machine sewing is quicker and more effective when many patches need to be sewn.
| Feature | Hand Sewing | Machine Sewing |
| Beginner Friendliness | Easy to begin with basic materials and simple techniques | Requires knowledge of how to operate a sewing machine |
| Speed | Slower, especially when working with larger patches | Faster once the machine is properly set up |
| Precision | Provides control over each individual stitch | Provides consistent stitching with regular use |
| Materials | Needle, thread, scissors, and optional pins | Sewing machine, needle, thread, and other accessories |
| Heavy Fabrics | Offers excellent control when working with thick materials | May require stronger needles and appropriate machine settings |
| Curved Patches | Easy to adjust gradually around curves | Requires careful and skillful fabric manipulation |
| Decoration | Allows highly personalized stitching styles | Many machines offer decorative stitch options |
| Best For | Single patches, repairs, and small projects | Multiple patches and recurring sewing projects |
| Portability | Highly portable and requires minimal equipment | Requires access to a sewing machine |
| Difficulty Level | Low | Medium, depending on sewing machine experience |
For someone applying a single patch to a jacket or bag, hand sewing is often sufficient. For larger projects involving numerous patches, machine sewing can save considerable time.
Patch placement needs to take into account both visual and practical considerations.
Popular areas for placing patches on jackets include the upper part of the chest, sleeves, back panel, and shoulder regions. But the optimal place will depend on how the jacket is made and on the size of the patch. Do not try to attach a patch right over an area with complex seams unless you are sure you can work the patch through the layers.
Some options for hoodies are the chest area, sleeves, and upper back. Since hoodie material is usually softer and more elastic compared to jeans, make sure the stitches will secure the patch without stretching the material too much.
Canvas and similar material of bags and backpacks are great for placing patches. But do not forget to look inside the bag and avoid stitching any pockets or lining by mistake.
Before you start to sew, put the garment in the usual position, check how it looks, and consider whether you like the place you chose.
The construction of a patch impacts the sewing process. Embroidered patches usually have a raised appearance and texture, while those that are woven are relatively flat and capable of producing finer details.
It is necessary for the border of the patch to be strong enough to enable stitching. An adequate finish on edges of patch will make it easy to produce an even seam line, avoiding fraying.
Where durability is the primary concern, you need to consider the purpose of the item of clothing that the patch is meant for. The construction of a patch for a fashion wear piece may be very different from one that is worn as work clothing or as outdoor gear.
Canada custom patches are available in different shapes, sizes, materials, and finishes.
When you buy Canada custom patches online, consider looking into things other than the artwork showcased on a product page. These factors include patch dimensions, border material, backing, threads, colors, and patch application.
The design illustration must be an accurate representation of the final artwork especially if the patch includes small texts or details. You may want to ask whether the patch will be sewed, heat pressed, attached using Velcro, and any other method of application. It is also necessary to ask if there is a provision for approving samples or confirming the artwork before proceeding to the production stage since this helps in spotting spelling mistakes, sizing problems, and details that do not scale up well in the final patch.
For projects that demand sewing, buyers who buy custom sew on patches made with proper borders and backing for easy sewing onto fabric.
Depending on the patch type, there may be different ways to do it. Generally, embroidered patches can be sewn along their perimeter using either the whip stitch, blanket stitch or straight stitch. Since the embroidered patches tend to be thick, it may be advisable to use a sharp strong needle.
Woven patches are usually not as thick and therefore easy to stitch as they have smooth surface since they are not embroidered. Their detail makes them good for stitching when small lettering or artwork is needed.
Patch with printing may have smooth surface and need careful handling since their printing will be easily damaged by stitching through it. The border of the patches and not the art itself should be stitched through.
The leather and leather-looking patches should have suitable needles and threads since the material will not take a standard sewing needle well. The number and placement of stitches should be carefully thought about to avoid unnecessary holes.
Finally, Velcro-backed patches are meant for temporary attachment hence fastener will be stitched to fabric and not patch itself.
One of the common errors is not stabilizing the patch before stitching. Even a little movement can result in the patch being sewn incorrectly.
Using inferior quality and inappropriate threads is another mistake that many people do when sewing patches. Decorative threads may seem very beautiful, but they cannot resist washes and wear well.
The spacing of stitches can also have an impact on the final result and make a patch look untidy. Equally-spaced stitches will give a neat look and will even the tension of the thread around the border.
Another common error is pulling the thread too tight. It will create unnecessary tension and lead to puckering, especially for light fabric.
Newbies should also be careful when stitching around the corners and curves. Gradual adjustment of the fabric will give a neater result than sewing across awkward angles.
Not checking the wrong side of the garment may result in joining layers of a patch to other pockets and linings by accident.
It is always recommended to adjust your sewing method according to the material and construction of the clothing. Light clothes should be sewn with light needles, proper thread, and appropriate tension, whereas denim or canvas can withstand more sturdy needles and thread.
Determine beforehand whether there are multiple layers of the clothes you are patching. Since jackets, hoodies, and bags can have linings and pockets which get caught under the patch.
Do not pull your fabric tight while sewing since, after being released from stretching, it might shrink and wrinkle around the patch. In case you are doing the patching manually, do not overwork the fabric with the needle as its repeated piercing at the same place may harm it. If the garment is precious and fragile, or if it is hard to mend, it is reasonable to try out the technique first on some fabric sample.
A proper wash routine will help to prolong the life of your sewn patch. When possible, turn the garment inside out prior to washing. In this way, you will limit the friction that the patch will have with other clothing items or inside of the washer.
Use the correct washing temperature. It is not recommended to use aggressive washing conditions, including high temperatures and detergents. Check the border of the patch after washing. You should immediately repair any broken stitches on it rather than wait for the entire piece to fall off. Do not pull the loose threads; cut them with scissors carefully. It is important to dry the garment properly because the high temperature can influence both fabric and patch material. By regularly checking the patch and using the correct washing techniques, you can keep it on for a long time.
Whip stitch is among the easiest to do for beginners since it is simple and secure enough as well as effective when stitching many patches. A blanket stitch gives an appealing look, whereas a straight machine stitch gives an attractive look. It all depends on the construction of the patch, the thickness of fabric, and the look that you desire.
Various types of patches have different methods of application based on how they were made and what they are made of. Embroidered patches can normally be sewn around their edge, whereas woven patches fit perfectly when sewn along the perimeter using densely placed stitches.
Among some common mistakes is not securing the patch prior to stitching, using poor quality thread, use of the wrong needle, uneven spacing of the stitches, tight stitching of the thread and accidental catching of the pocket or lining. One more common mistake is rushing while turning the corners, as it causes wrinkles.
When putting a patch on clothes, the following process is involved: choose the appropriate clothes, clean them, place the patch appropriately, and fasten it using pins or clips. Select an appropriate needle and thread to sew the patch and make sure there is consistent stitching along the edge of the patch.
Indeed, a patch made of iron-on fabric may sometimes be strengthened or joined by stitching, as long as its structure enables the needle to pierce the edges without damage. This can come in handy in situations where greater strength is required. Stitching along the edges decreases the need for glue and helps ensure that the patch stays attached even after multiple washings.
A universal count does not exist since the size of the patch, the width of the borders, the nature of the material, and the type of stitches determine the correct count. In a general sense, the stitches should be spaced in such a manner that the edges will not lift but will also not weaken the fabric.
The best practice for maximum longevity is sewing around the full perimeter of the patch. Stitching around the whole perimeter of the patch spreads out the strength, thus making it less likely that any one corner will lift up. For a very large or heavy patch, more stitching may be necessary within the patch itself.
It is possible to attach patches to certain kinds of elastic material, though special precautions need to be taken since the material itself acts differently from the inflexible patch. Too much thread tension can lead to the material gathering in an unappealing manner or limit its elasticity.
Sewing patches does not need any prior knowledge of tailoring. The correct preparation, use of appropriate equipment, the right needle, and thread, along with steady stitching will ensure a neat and long-lasting outcome.
Hand sewing allows for good control while making the project, while using a sewing machine ensures quick work when sewing several patches. All the main rules will stay the same. Picking up an appropriate patch and material, positioning the patch correctly, securing the patch before stitching, maintaining steady tension, and fastening the thread properly. If the intention is to make personalization of the jacket, to make the backpack stronger, to decorate the hoodie, to make a uniform, or to keep the meaning of the patch, sewing will help turn a simple design made of fabric into a lasting element of the outfit.
Talk to our patch experts

High quality. Fast turnaround. 100% satisfaction guaranteed.