- Made in Canada
- Free Artwork & Mockup
- Fast Turnaround
- No Setup Fees
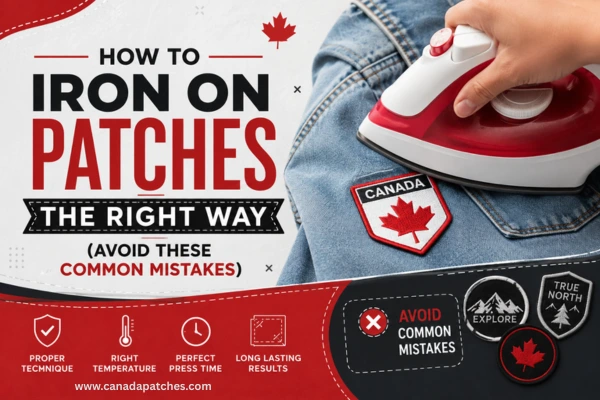
Iron-on patches have been one of the most convenient and fashion-forward approaches to customizing clothes and repairing damaged fabric and garments. From jackets, backpacks, uniforms to workwear – patches are a solution which provides both functional qualities and a unique touch. However, it often happens that a patch starts lifting from the corners, peels up when washed, or just does not stay at all. In most cases, this is not because the patch was faulty; it is because of the way it was applied.
The knowledge of how to iron on a patches will help you to achieve a more lasting and appealing result. It is rather easy to learn how to apply a patch; however, one needs to take into account some important details like preparation, right temperature and pressure and how the fabric will react to heat. High-quality patch may fail due to improper activation of the adhesive layer and incorrect material used.
This article will tell you the whole process of applying patches and will show what mistakes people usually make while doing so.
Iron-on patches are either embroidered, woven, or printed pieces of fabric, but they are backed with an adhesive which becomes activated when the right combination of temperature, pressure, and time is applied.
Unlike the older type of patches that are sewn on fabrics, iron-on patches take less effort and are easier and faster to apply.
Iron-on patches have gained popularity due to the flexibility in using them since they are available in different colors, shapes, and textures and can therefore be used in customizing clothes or even repairing torn and stained clothes.
The popularity of iron-on patches is further brought about by the fact that the patches can easily be attached to a piece of fabric without changing its characteristics.
To prevent early lifting or edge peeling of the patch, it is important to know how the adhesive works.
Many people think it is the iron that helps stick the patch on the clothing. In truth, the thermoplastic materials incorporated into the adhesive layer located at the back side of the patch melt under heating.
Once melting occurs, the material penetrates through the fibers of the compatible fabrics such as cotton and jeans. After keeping the pressure on and letting the material cool down, the adhesive melts, thus creating the bond mechanically securing the patch.
That is why both heating and pressure are important for the process. The high temperature without enough pressure will create air bubbles underneath the patch, and the vice versa will not let the adhesive melt properly.
The importance of the complete cooling of the garment lies in the fact that any disturbance during the process of adhesive hardening will weaken the final bond.
Every material does not respond the same way to heat. Some materials are able to withstand heat and can be penetrated by the glue, whereas others melt, warp, and do not bond at all.
Natural materials such as cotton and denim usually give the best outcome as they are able to withstand heat necessary to set the glue. Canvas and heavy cotton materials are also great to use for lasting bonds.
Synthetic materials need more attention. Polyester blends usually respond well to moderate heat setting, whereas nylon, water resistant materials, leather, silk, and elastic materials usually prevent the material from bonding or get damaged.
Always read the instructions for ironing your garment on the care label as it gives information about the temperature needed for the iron.
Choosing the right temperature for ironing on patches is one of the essential components of patch application. If there is not enough heat, then the adhesive will be partially activated, while too much heat may spoil both the patch and the garment.
The following table provides general guidance for common fabrics.
| Type of Fabric | Iron Temperature Setting | Suitable for Ironing | Significant Point |
| Cotton | High (150–180°C) | Yes | Forms one of the strongest adhesive bonds. |
| Denim | High (160–180°C) | Yes | Thick fabric may require slightly longer ironing time. |
| Canvas | High | Yes | Ideal for backpacks, tote bags, and other heavy-duty fabrics. |
| Polyester Mix | Medium | Yes | Avoid excessive heat to prevent fabric damage. |
| Wool | Medium-Low | Yes | Requires careful ironing with a pressing cloth. |
| Rayon | Low | No | High temperatures can damage or melt the fibers. |
| Nylon | Low | No | Heat-sensitive material prevents proper adhesive bonding. |
| Leather | Do Not Iron | No | Direct heat can permanently damage the leather surface. |
| Waterproof Fabrics | Do Not Iron | No | Adhesive cannot bond effectively to coated or waterproof materials. |
Recommendations could be different according to the specific clothing maker and patch producer; therefore, it would always be helpful to refer to instructions from both sides.
However, preparation plays a vital role in this process but is often disregarded.
First, wash and dry the garment entirely. The dirt, lint, body oil, or fabric softener left on the garment affects adhesion because it acts as an obstacle to the interaction between the glue and the cloth.
Second, lay the garment on a smooth and heat-resistant surface. Even though an ironing board comes in handy in this case, it absorbs pressure due to the padding in it. The best surface is a smooth table covered with a towel.
Third, smooth the fabric before laying the patch on it. This ensures there are no wrinkles underneath the adhesive, which makes the corners lift from time to time due to uneven adhesion.
After smoothing the fabric, position the patch in its exact position. This ensures that no further adjustment will be made after heat application to it.
Application actually takes place only after the preparation is finished.
Lay a cotton pressing cloth or a thin pillowcase over the patch. The additional layer will protect the embroidery from the direct heat and distribute it evenly throughout the entire area.
Turn off the steam function. Steam might negatively affect the adhesive properties of the patch.
Hold the iron and press down on the patch for about 20 to 30 seconds without moving it back and forth. Continuous movement moves the patch until the adhesive melts. Press down constantly to ensure that heat affects the entire surface.
Heat the back of the patch by turning the garment inside out and holding the iron on it for an additional 20 to 30 seconds. Both sides being heated increases the adhesion between the patch and the clothing.
After you have ironed the patch, allow the garment to cool down. Checking it while it is hot may damage the adhesive.
By this time, the patch should be lying flat, adhered securely, and without any bubbles or raised edges. Loose edges will require controlled heat again rather than just turning up the heat too high.
The next step is determining what type of uses iron-on patches are best suited for. Why some uses are not successful even when the directions are followed, and what maintenance can do to make them last longer.
Choosing where to place a patch is just as important as understanding how to use it. Flat and strong parts of the clothes will make good places since the iron will spread the heat and pressure equally. Some examples include jacket back, shirt sleeves, jean pockets, backpacks, canvas bags, and work aprons.
There are some areas that should be taken into account separately. Curved places and places where there is a lot of stitching prevent the glue from contacting with the cloth. It will become difficult to make it stay if the patch needs to be applied to such a place. More pressure or stitching can help here.
Many people decorate hats, sports clothes, and uniform as well. But if it is not possible to lay clothes on the table under the iron, then it will be better to sew it.
Most of the failures stem from trivial yet easily preventable mistakes, not because of the faulty patches themselves.
One common mistake is steaming. Steam creates moisture that prevents even melting of the adhesive, hence decreased ability of adhesive to hold onto the fabric. Shifting of the iron during application without maintaining constant pressure on the patch also leads to the movement of the patch before the adhesive can attach itself.
Choosing the wrong type of fabric is another mistake. Some materials like leather, nylon, and water-resistant materials do not adhere well to heat adhesives. Using too much heat may burn the fabrics as well as the embroidery stitches.
Yet another mistake is the removal of the pressing cloth too soon and immediately testing the edges. The adhesive is still flexible, hence any lifting of the edges while the patch is still hot will decrease adhesion.
Failure to stick in most cases is caused by various factors.
The temperature of the iron may not be hot enough to activate the adhesive. Lack of sufficient pressure can result in minute spaces between the patch and the fabric thus insufficient contact.
Fabric that is chemically processed or dirty may also lower adhesiveness. There are chemicals used on clothes that make it difficult for the adhesive to get into the fabric.
In some cases, it is possible that the adhesive itself becomes old and ineffective through poor storage or too much exposure to heat or moisture. When this happens, the best option is to sew around the edges.
Firms that produce Canada patches for uniforms, clubs, schools, or any other clothing items advise users to use both heat treatment and sewing when there are constant washing and use of such garments.
How you take care of your clothes after applying the patch affects the life of the patch.
Give the adhesive time to cure for a minimum of twenty-four hours before you wash the clothes.
Washing should be done with cold or lukewarm water as hot water might reduce the bond strength of the patch over a number of washes, particularly where the cloth is repeatedly washed.
The best option is air drying because extreme heat from dryers can reduce the effectiveness of the adhesive over time. If the clothes must be dried in a machine, you can use the low-heat option in order to avoid stressing both the patch and the clothing material.
Some of the companies who offer also advise that the patches should not come into contact with bleach and other harsh chemicals since it can reduce their longevity without doing the custom patch immediate harm.
Taking care of the patch will be very easy and straightforward, but it could mean the difference between having a patch for several years and just a few months.
However, despite the household iron being a preferred iron on patch application tool, there are other alternatives.
The best option for creating high quality results comes from the use of heat press since they give consistent temperature and pressure. Heat presses are therefore good for garment decoration in business environments.
Some hair straighteners have been known to be able to apply the custom iron on patches where patches are very small and applied on narrow spaces like sleeves or pockets but pressure is harder to apply.
In the absence of heat sources, iron on patches will not function. The best alternative for this scenario is sewing.
When a business invests in iron on patches, they are advised to purchase a professional heat press as opposed to household irons since their temperatures remain consistent.
The correct method involves preparing a clean, dry garment, placing the patch in the desired position, covering it with a pressing cloth, and applying firm, steady pressure using a dry iron set to the appropriate temperature. After pressing the front for approximately twenty to thirty seconds, the reverse side should also be heated whenever possible. Allowing the garment to cool completely before testing the patch helps ensure the adhesive forms a durable bond.
A few mistakes can interfere with the proper use of iron-on patches. These include using steam, wrong temperature, ironing inappropriate fabrics, constant movement of the iron and checking the patch before allowing it to cool. Not cleaning the fabric and trying to stick the patch onto waterproof or heat-sensitive fabrics may also result in ineffective adhesion.
Wrong. It is important to keep the steam feature turned off when applying. This method of application uses dry heat and pressure, not steam. Steam can make the process less efficient because it brings unnecessary moisture into the bonding area. A dry iron and a pressing cloth are more appropriate tools for the job.
Most iron-on patches need strong pressure to be applied successfully for about twenty to thirty seconds on the frontal side of the garment. In cases where the garment allows, additional pressure can be applied for twenty to thirty seconds on the reverse side of the garment. Extra time may be needed in some cases with thick materials like denim and canvas, but excessive heat must be avoided.
It is important to follow instructions provided by the manufacturers when working with valuable garments and when manufacturing branded items using patches. The use of high-quality patches and fabric will enable you to get better results.
For whatever reason you need patches, whether to decorate your clothes or repair old ones, or manufacture branded uniforms, the choice of high-quality patches will make a difference.
Learning how to iron on patches is much more than simply applying an iron to a piece of cloth. In order to apply a good patch, you will need to know which materials will be compatible. Then prepare the garment, use the correct temperature, apply pressure evenly and take good care of your patch.
Most problems that people have, such as patches peeling, low bonding, and early lifting are due to the mistake in installation. Not due to low-quality patches. Knowing how heat and fabric can affect each other, knowing how important the adhesive layer is. Using the right amount of pressure will help you create a beautiful patch.
If you want to fix your old garments, create custom patches on your jacket, make brand patches for uniforms or add some personality to your clothes. Then learning to install patches properly will help you keep your patches in good condition for many years.
Talk to our patch experts

High quality. Fast turnaround. 100% satisfaction guaranteed.